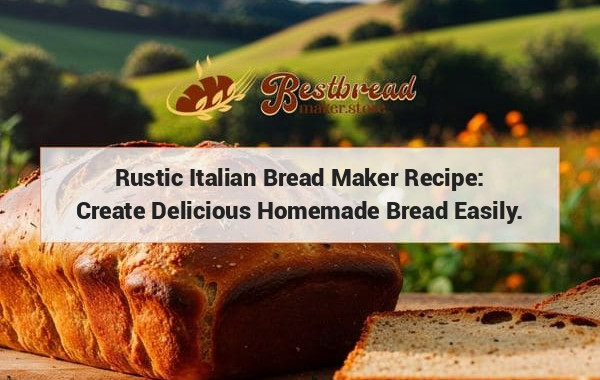
Rustic Italian Bread Maker Recipe: Create Delicious Homemade Bread Easily.
Create your own rustic Italian bread with this easy bread maker recipe. Simply combine flour, yeast, salt, and water in your bread maker, then let it do the hard work for you. This recipe will give you a delicious loaf of bread with a crusty exterior and a soft, chewy interior - perfect for dipping in olive oil or enjoying with a bowl of pasta. Enjoy the taste of Italy in your own home with this rustic Italian bread maker recipe.
When it comes to creating the perfect rustic Italian bread maker recipe, it’s all about balancing traditional methods with modern convenience. For anyone who wants to enjoy the taste of homemade Italian bread but doesn’t have the time to knead dough by hand, a bread maker is the ideal tool. In this guide, we will explore how to create delicious rustic Italian bread using a bread maker and share some tips to ensure you get the best possible result.
Key Takeaways: Rustic Italian bread made in a bread maker combines convenience with traditional flavors. With the right ingredients and technique, you can enjoy a loaf that is crispy on the outside and soft inside.
The Importance of Choosing the Right Ingredients
To get started with this rustic Italian bread maker recipe, the ingredients you choose are critical. Traditional Italian bread relies on simple, high-quality ingredients, so sourcing the best ones will greatly impact the taste and texture of your bread.
Essential Ingredients for Rustic Italian Bread
Flour – The foundation of any bread recipe is flour, and for Italian bread, you want to use high-quality, unbleached bread flour. This gives the bread its chewy texture.
Water – Water is more important than you might think. It should be lukewarm, around 110°F, to help activate the yeast properly.
Yeast – Active dry yeast or instant yeast works best in bread makers, providing the rise that Italian bread is known for.
Olive Oil – A good-quality extra virgin olive oil adds moisture and a subtle flavor to the dough, enhancing the richness of the bread.
Salt – Salt balances the flavor of the bread, but be careful not to use too much as it can inhibit yeast activity.
Sugar or Honey – Although optional, a small amount of sugar or honey can feed the yeast and give the bread a slightly sweeter flavor.
Understanding the Bread Making Process
Bread making may seem complex, but using a bread maker simplifies the process. Your bread maker handles all the heavy lifting, from kneading the dough to proofing and baking it. Let’s break down the steps you’ll follow in your bread maker for the perfect rustic Italian loaf.
Steps for Making Rustic Italian Bread in a Bread Maker
Add the Ingredients in the Right Order – Start by adding the wet ingredients, like water and olive oil, followed by the dry ingredients like flour, salt, and yeast. Ensure the yeast is placed on top of the dry ingredients to avoid premature activation.
Choose the Dough Setting – Set your bread maker to the dough cycle, which will mix, knead, and let the dough rise. This step usually takes around 90 minutes, depending on your bread maker model.
Shape the Dough – After the dough has risen, take it out of the bread maker and shape it into a loaf. For a rustic look, you can simply fold it into an oval or round shape.
Second Rise – Let the dough rise again for about 30-40 minutes before baking. This helps to develop the texture and flavor of the bread.
Baking – You can either bake the bread directly in the bread maker or transfer it to an oven for a more traditional finish. If baking in the oven, preheat to 425°F and bake for 25-30 minutes until the crust is golden brown.
Why You Should Use a Bread Maker for Italian Bread
A bread maker simplifies the process of creating rustic Italian bread. From mixing to kneading, it ensures consistency and ease, making it accessible for beginners. The controlled environment within the bread maker also aids in the fermentation and rise of the dough, resulting in better bread texture.
Advantages of Using a Bread Maker
Consistency – The bread maker ensures consistent kneading and proofing, leading to more reliable results.
Hands-Free Convenience – Once you add the ingredients, the machine does all the work, giving you time to focus on other tasks.
Better Dough Development – Bread makers create the perfect environment for dough to rise, especially with yeast-based bread like Italian loaves.
Versatility – You can customize your bread by adding herbs, garlic, or olives to the dough for a unique flavor.
Common Mistakes to Avoid
While using a bread maker makes the process easier, there are still a few common mistakes to watch out for. Understanding these pitfalls will help you achieve the perfect rustic Italian bread every time.
Mistakes to Avoid When Making Rustic Italian Bread
Using Cold Water – Cold water can prevent the yeast from activating, leading to a dense loaf. Always ensure your water is lukewarm.
Too Much Flour – Adding too much flour can make your bread heavy and dry. Stick to the recipe measurements and use a kitchen scale for accuracy.
Skipping the Second Rise – The second rise is crucial for the texture and flavor of the bread. Don’t rush this step, as it allows the dough to develop properly.
How to Serve Rustic Italian Bread
Once your rustic Italian bread is ready, there are countless ways to enjoy it. Whether served as a side with pasta or used for making sandwiches, the options are endless.
Creative Serving Suggestions
With Olive Oil and Balsamic Vinegar – This simple combination is a classic way to enjoy fresh bread. Pour a little olive oil and balsamic vinegar on a plate, and dip the bread for a delightful starter.
As a Base for Bruschetta – Top your bread with tomatoes, garlic, basil, and olive oil to create a delicious bruschetta.
For Sandwiches – Rustic Italian bread is perfect for hearty sandwiches. Pair it with cured meats, cheese, and fresh vegetables for a filling meal.
Alongside Soups and Stews – The chewy texture and crispy crust of the bread make it ideal for dipping into soups or stews.
Frequently Asked Questions
1. Can I make rustic Italian bread without a bread maker?
Yes, you can make rustic Italian bread by hand or with a stand mixer. The process is more labor-intensive but still yields excellent results. Follow the same ingredients but knead the dough by hand or with a dough hook attachment.
2. What is the best flour to use for rustic Italian bread?
Bread flour is recommended for its higher gluten content, which gives the bread a chewier texture. If you don’t have bread flour, all-purpose flour can be used, but the texture may not be as robust.
3. Can I add herbs or other ingredients to the bread dough?
Yes, you can customize your rustic Italian bread by adding ingredients like rosemary, garlic, or olives to the dough. Simply add these ingredients during the kneading process in the bread maker.
4. How long does homemade rustic Italian bread last?
Homemade bread is best enjoyed fresh but can be stored in an airtight container at room temperature for up to three days. For longer storage, you can freeze the bread for up to three months.
5. How can I get a crustier loaf using a bread maker?
For a crustier loaf, bake the bread in your oven rather than the bread maker. Place the dough on a baking stone or sheet, and bake at a high temperature for the best results.
For those looking to invest in a quality bread maker, consider visiting bestbreadmaker.store, where you can find reviews and recommendations on the best models for making Italian bread and other types of bread at home.
By following these tips and techniques, you’ll be able to create a delicious rustic Italian bread with ease, using your bread maker to its full potential. Enjoy the satisfaction of homemade bread with minimal effort!


