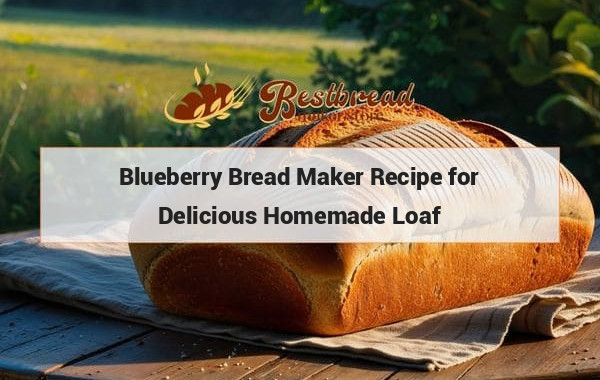
Making Homemade Bread Without a Bread Maker: Easy Step-by-Step Guide
Looking to make homemade bread without a bread maker? It's easier than you think! All you need is flour, yeast, water, salt, and a bit of patience. Mix the ingredients, knead the dough, let it rise, then bake in the oven. Enjoy the delicious aroma and taste of freshly baked bread without the need for a fancy machine. Try it out today and impress your friends and family with your homemade bread-making skills!
Homemade Bread Without a Bread Maker: Your Ultimate Guide
Making bread at home without a bread maker is simpler than you might think. Whether you are a novice baker or an enthusiast seeking the rustic charm of homemade loaves, this guide will walk you through the essentials of baking delicious bread right in your kitchen. Learn about key techniques, ingredients, and troubleshooting tips for perfect results every time.
Key Takeaways
Homemade bread can be made without a bread maker by mixing simple ingredients like flour, water, yeast, and salt. Knead, proof, and bake to achieve a soft interior and crusty exterior.
Understanding the Basics of Homemade Bread
Homemade bread is all about simplicity. With just a few ingredients—flour, water, yeast, and salt—you can create a loaf that rivals those from professional bakeries. The absence of a bread maker allows for more control over the process and texture of the bread. It's a hands-on experience that connects you directly to the food you create.
Essential Ingredients and Their Roles
Flour: The foundation of any bread. You can choose between all-purpose flour or bread flour for different textures. Bread flour has higher protein, yielding a chewier texture.
Yeast: The leavening agent. Active dry yeast or instant yeast works best. Remember, fresh yeast also adds depth but requires more precise handling.
Water: Lukewarm water helps activate the yeast, allowing it to ferment and create air pockets that make the bread rise.
Salt: Enhances flavor and controls yeast activity. Without salt, the dough might rise too fast, compromising flavor.
By understanding these basics, you set yourself up for success, even without the help of a bread maker.
Step-by-Step Guide to Baking Bread Without a Bread Maker
The process of making bread without a bread maker involves several steps, but each is simple and manageable. Let’s explore the steps in detail to achieve the perfect homemade loaf.
Mixing the Dough
Start by mixing the dry ingredients—flour, yeast, and salt—in a large bowl. Gradually add lukewarm water while mixing with your hand or a wooden spoon. The dough should come together but still be slightly sticky. Adjust the water or flour as needed to get the right consistency.
Kneading
Kneading is crucial for gluten development, which gives bread its structure. Flour a surface, turn out the dough, and knead for about 10 minutes until it becomes smooth and elastic. A good test is the “windowpane” test: stretch a small piece of dough; if it forms a thin membrane without breaking, it's ready.
Proofing the Dough
Proofing, or letting the dough rise, is essential for a light and airy texture. Place the dough in a greased bowl, cover it with a damp cloth, and let it rise for 1-2 hours or until doubled in size. The temperature should be warm, around 75-80°F (24-27°C), to create the ideal environment for yeast activity.
Shaping and Second Proof
After the first rise, punch down the dough to release excess air, then shape it into a loaf or rolls. Place the shaped dough on a baking tray or in a loaf pan, cover it again, and let it rise for another 30 minutes.
Baking
Preheat your oven to 425°F (220°C). For a crusty exterior, place a small pan of water in the oven to create steam. Bake the bread for about 25-30 minutes or until golden brown. A quick test for doneness: tap the bottom of the loaf—if it sounds hollow, it's done.
Troubleshooting Common Issues
Baking bread without a bread maker can come with a few challenges, especially for beginners. Below are some common issues and tips on how to overcome them:
Dough Isn’t Rising
If your dough isn't rising, the yeast might be inactive. Ensure your water is lukewarm, not hot, as high temperatures can kill yeast. Fresh yeast also ensures active fermentation.
Bread Is Dense
Dense bread often results from insufficient kneading or not allowing enough time for proofing. Make sure to knead the dough until it’s elastic and allow it to double in size before baking.
Crust Too Hard
If the crust turns out too hard, reducing the oven temperature slightly or baking with steam can help create a softer, more desirable crust.
Alternative Techniques for Bread-Making Without a Bread Maker
If you’re experimenting with homemade bread, there are several methods you can try without a bread maker. These methods offer variations in texture, flavor, and ease.
No-Knead Method
This method is perfect for those who prefer a hands-off approach. It involves mixing the dough and letting it rise for an extended period, typically overnight. The long fermentation develops flavor without the need for kneading, and the result is a rustic loaf with a chewy texture.
Artisan Dutch Oven Bread
Baking bread in a Dutch oven helps create a professional-quality crust at home. The enclosed space traps steam, replicating a professional bread oven. Preheat your Dutch oven, place the dough inside, and bake with the lid on for the first 20 minutes before removing it to finish baking.
Why Make Bread Without a Bread Maker?
There are several reasons why you might choose to make bread by hand instead of using a machine:
Control Over the Process: Without a machine, you can adjust each stage of the bread-making process, such as kneading and proofing, for different results.
Artisanal Quality: Handcrafted bread often has a better texture and flavor profile, thanks to the direct interaction with the dough.
Cost-Effective: Bread makers can be expensive, while hand-kneading requires nothing but your hands and a few simple tools.
For those considering investing in a bread maker, bestbreadmaker.store provides detailed reviews and options for various bread makers that could enhance your home baking experience.
Frequently Asked Questions
1. Can I use whole wheat flour instead of all-purpose flour?
Yes, but whole wheat flour absorbs more water, so you may need to adjust the liquid in the recipe. It also creates a denser loaf, so combining it with all-purpose flour can help achieve a lighter texture.
2. How do I store homemade bread?
Store homemade bread in a paper bag or wrapped in a kitchen towel to maintain the crust's texture. For longer storage, wrap it in plastic and freeze it; it will last up to three months.
3. Why does my bread have a yeasty taste?
A strong yeasty flavor can result from over-fermentation. Make sure not to let the dough rise too long during the proofing stages, especially the first rise.
4. What is the best flour for baking bread?
Bread flour is ideal because of its high protein content, which develops more gluten and results in a chewier texture. All-purpose flour can work, but the texture might be softer.
5. Can I add herbs or seeds to my bread?
Absolutely! Incorporating herbs like rosemary or thyme, or seeds such as sesame, chia, or flaxseed, can add flavor and texture. Mix these ingredients into the dough during the initial mixing stage for best results.
By following this comprehensive guide, you can master the art of making homemade bread without a bread maker. Whether you’re aiming for a simple loaf or experimenting with more complex methods, the process is both rewarding and satisfying. For those interested in exploring bread maker options for future convenience, bestbreadmaker.store offers excellent recommendations and reviews tailored to your needs. Enjoy your baking journey!

